Customers
List of Customers
This option lists existing Customers and also allows new Customers to be created.
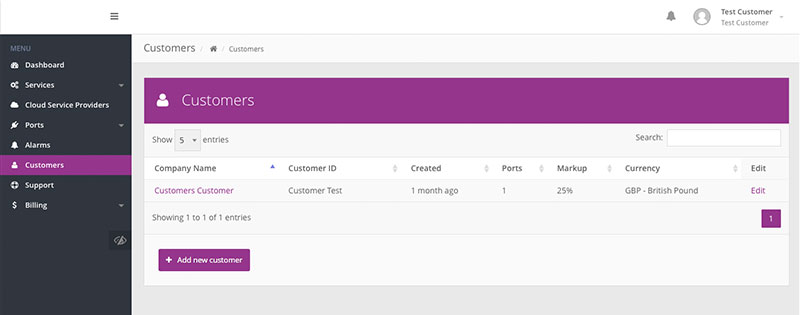
The 'Customers' table displays the following information:
| Heading | Description |
|---|---|
| Company Name | Name of the Customer as entered when created in CloudLX |
| Customer ID | Manually entered free format ID for use by Customer (e.g. unique Customer number that can be used for linking in to a CRM or Finance system) |
| Created | Time since the Customer was created |
| Ports | The number of Ports allocated to the Customer |
| Markup | The markup applied for the Customer on-top of the standard pricing |
| Currency | Currency in which a Customer’s charges are calculated, displayed and billed |
Please ensure that the appropriate exchange rate is entered when using currencies, as otherwise the incorrect charges may be incurred (i.e. losses or over-charges). See the Billing section of the user guide for more information.
Creating a Customer
The process to setup a new Customer is as follows:
- Login to CloudLX.
- Click on the 'Customers' menu option on the left hand menu.
-
On the page click the 'Add new Customer' button and a new screen loads where the company details and the Admin User details can be entered:
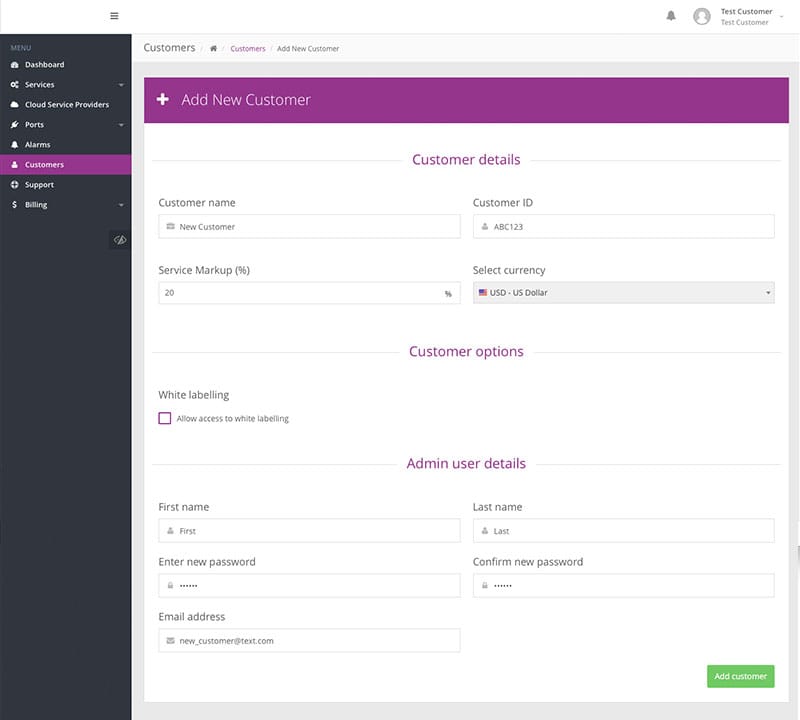
Field Description Customer Name Enter the Customer/company name Customer ID Unique Customer number, for linking in to a CRM or Finance system Service Mark-up Enter the mark-up (%) to be charged on top of the cost, to calculate the Customer price Currency Select the currency in which to invoice the Customer White Labelling If enabled, this option is visible within Customer options. Tick this box to allow the Customer to white label the appearance of CloudLX (otherwise the Customer will see the same branding as their upstream parent) First Name Admin User's first name Last Name Admin User's last name Password Enter the password in both boxes. Please Note: This cannot be viewed from anywhere within the portal, forgotten passwords can only be reset Email address This should be the email address of the Admin User – it is also the username for the Admin User, i.e. it needs to be a valid email address for system notifications to be received
Once all the fields have been entered, click the 'Add customer' button. The new Customer shown in Customers table.
Please Note: Options available are dependent on your access levels and permissions.