Ports
The Ports Menu
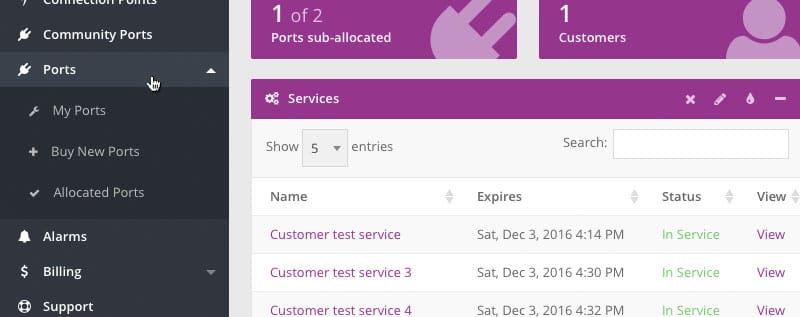
The Ports menu gives you access to three different functions:
| Menu Item | Description |
|---|---|
| My Ports |
|
| Buy New Ports | Buy new Epsilon Telecom ports |
| Allocated Ports | Ports already allocated to End-Customers |
My Ports
This option lists the status of Ports that are either;
- Available for allocation to End-Customers
- Currently in use by the User
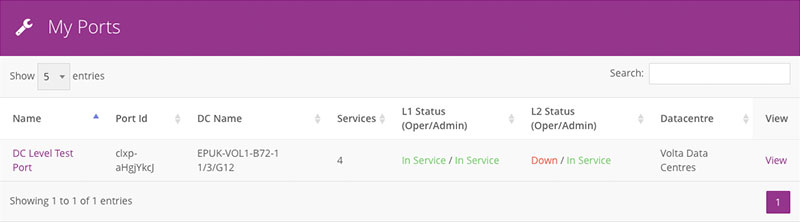
The 'My Ports' table displays the following information:
| Heading | Description |
|---|---|
| Name | Friendly Port name chosen by upstream A/C owner when allocating the Port. Can be edited by the Customer |
| Port Id | Dynamically generated by CloudLX. Used when requesting connection to another Customer's Port(s) |
| DC Name | Internal Port name (mapped to inventory data) |
| Services | The number of services provisioned on the Port. 0 means the Port is unused/free and can be allocated to a downstream Customer |
| L1 Status (Oper/Admin) | Link Layer status, Operationally and Administratively |
| L2 Status (Oper/Admin) | Layer 2 status, Operationally and Administratively |
| Datacentre | Physical Datacentre in which the Port is allocated |
| View | Link for clicking through to Port graphs |
Please Note: Edits are only available if correct level and permissions are granted.
When submitted, the form will be emailed to members of the group Sales Department at the parent organisation who will be able to allocate Ports.
To buy a new Port
-
Navigate to the 'Ports' menu and select 'Buy New Ports'.
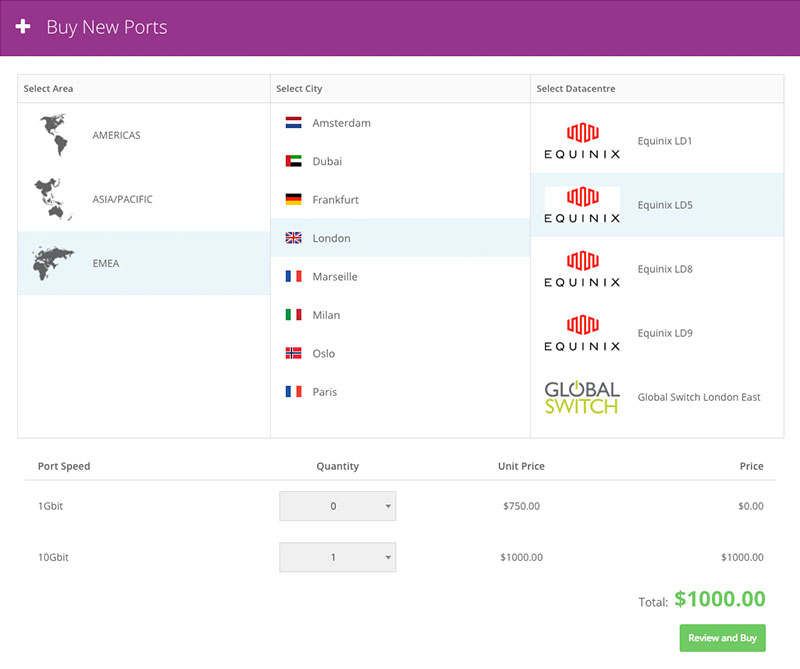
- Select Area, City, and Datacentre.
- Select the number of 1G and 10G ports.
- Click on the Review and Buy button.
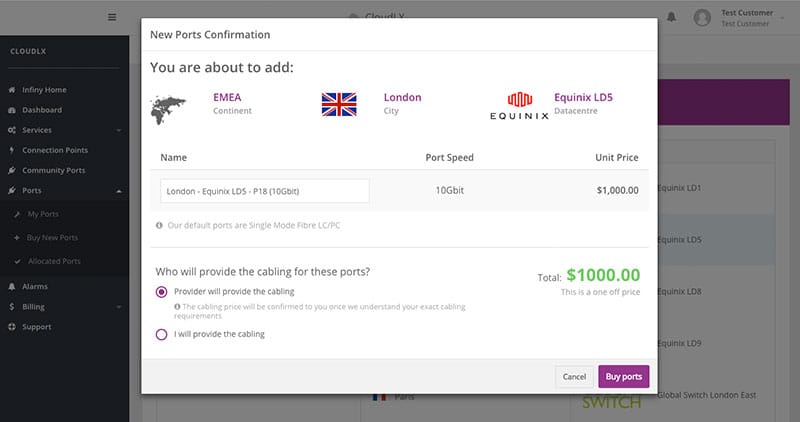
- Re-name the ports if needed on the New Ports Confirmation screen.
- Select the "I will provide the cabling" option if you don’t want Epsilon Telecom to do the cabling for the new ports.
Allocated Ports
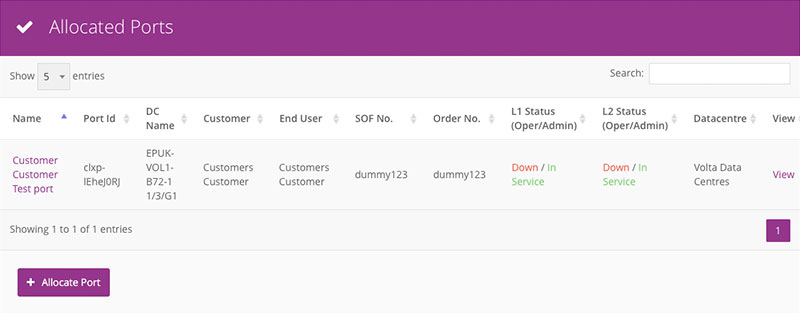
The 'Allocated Ports' table displays the following information:
| Heading | Description |
|---|---|
| Name | Friendly Port name chosen by upstream A/C owner when allocating the Port. Can be edited by the Customer |
| Port Id | Dynamically generated by CloudLX. Used when requesting connection to another Customer's Port(s) |
| DC Name | Internal Port name (mapped to inventory data) |
| Customer | The downstream Customer to which the Port is allocated (when viewed by the End-Customer, this will be the same) |
| End User | The Customer that is using the Port, i.e. has services provisioned on the Port |
| SOF No. | This is the Epsilon Telecom Service Order Form reference number |
| Order No. | This is the Customer Order reference number |
| L1 Status (Oper/Admin) | Link Layer status, Operationally and Administratively |
| L2 Status (Oper/Admin) | Layer 2 status, Operationally and Administratively |
| Datacentre | Physical Datacentre in which the Port is allocated |
| Type | This displays whether the Port is “Dedicated” or “Shared” |
| View | Link for clicking through to Port graphs |
Please Note: Edits are only available if correct level and permissions are granted.
To Allocate a New Port
- Navigate to the 'Ports' menu and select 'My Ports'.
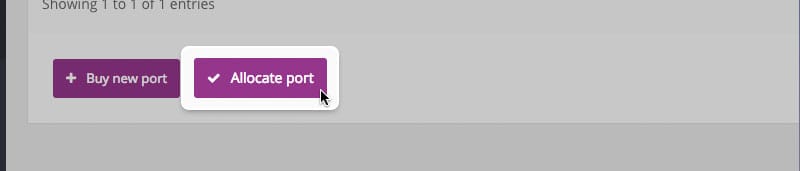
-
Click the 'Allocate Port' button, in the lower right hand corner, and a new pop up window appears.
-
Ports can be allocated to one single customer or multiple customers in order to maximise the usage of the ports. Use the drop downs box to select the Port and Customer you wish to allocate to. For multiple customers, please type in their names.
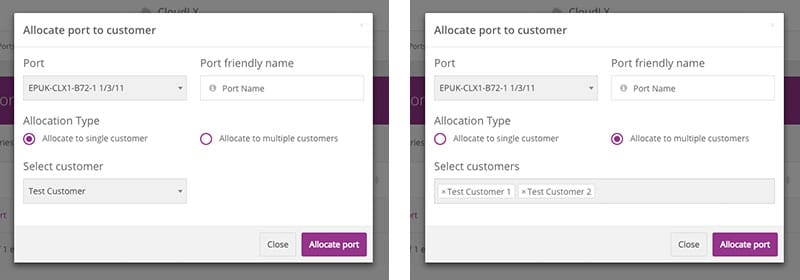
- Add a 'friendly name' for the port and then click the 'Allocate port' button.
The port will then be attached to the designated Customer(s) account.
Port Level Analytics
For each port, the system generates a Bandwidth Utilisation graph. The port status is read live from the network and the graphs shows live traffic utilisation for the last 24 hours with most recent sample to the right hand side. The graph can be zoomed in by dragging the handles of the blue slider below the graph or drawing a square anywhere on the graph.

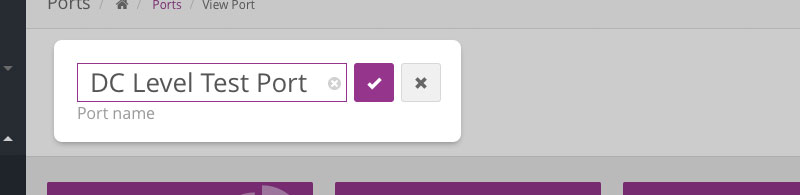
-
Port friendly name, which can be edited by clicking on it. Please Note: Edits are only available if correct level and permissions are granted.
-
Row of four tiles. These show:
- Committed bandwidth for all Services provisioned on the Port.
- Port speed (1Gbit).
- Regions for the Port – Click 'View All' to display all regions in which the Port can connect to other Ports and Services.
- ODF position – patch panel reference, for the Port's physical cross connect.

-
Status badge – Port status indicated by colour and text.

-
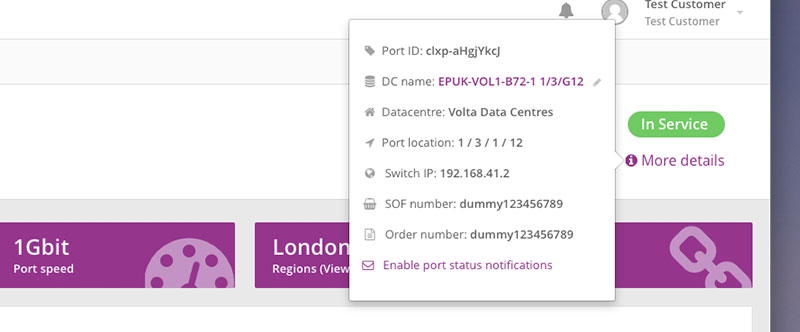
More Details – displays technical details for the Port. Please Note: Depending on level, illustrative may vary.
- Name of the graph.
-
Plot area, which can be zoomed and explored in greater detail, either by clicking and marking the desired area direct in the plot area, or, by adjusting the time line slider (see point 10).
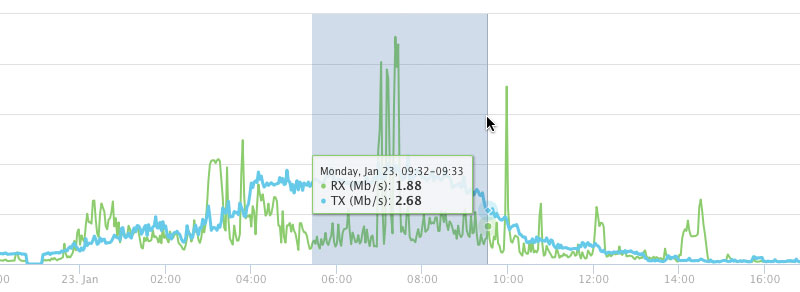
- The plot area will show the exact value for a given sample/point in time, when hovering the cursor over it:
- Time axis (X), for the 24 hour 'sliding window' of samples.
- Bandwidth axis (Y), in Mbps. Adaptive to plotted values.
-
RX / TX selector – clicking each value in the graph legend enables/disables it from the plotted graph.
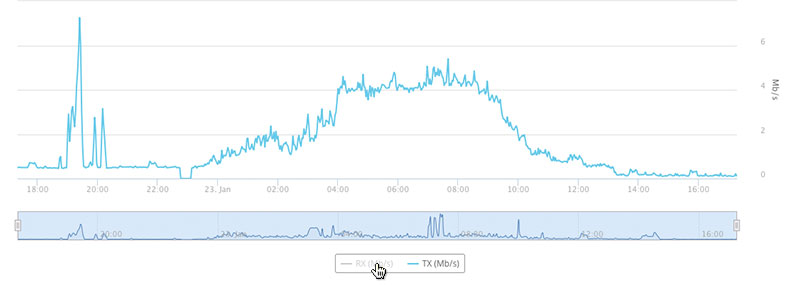
- Time line slider – this can be used for selecting and plotting a narrower time window. 'Grab' a handle and drag it to the desired position to zoom in.
- Totals of current RX, TX and the sum of them together.
-
Menu to save and print the graph for offline viewing.

Please Note: A successful service must be created for any analytical information to be created and viewed.