Services
Services Menu
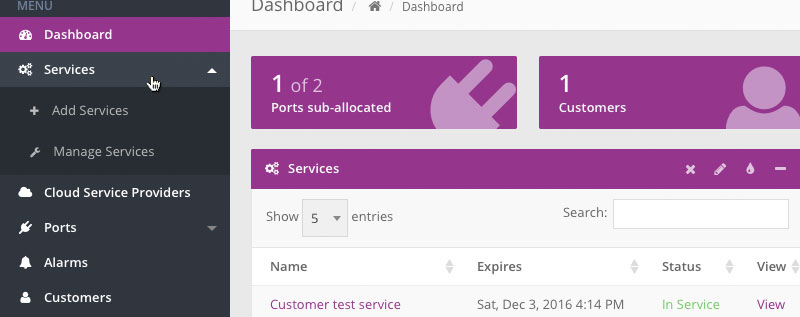
The Services option, on the menu bar located on the left hand side of the dashboard, has the following sub-options;
| Menu Item | Description |
|---|---|
| Add Services | This is used for adding Services to already assigned Ports |
| Manage Services | For managing existing Services |
Adding a Service
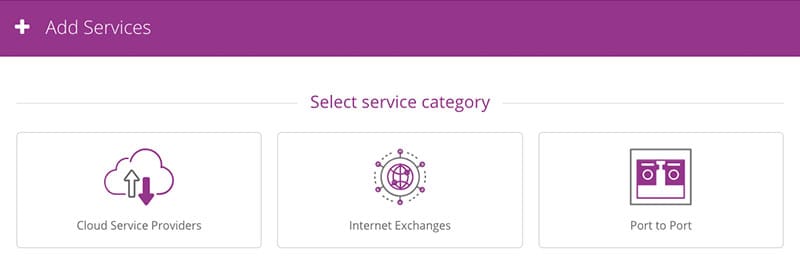
There are 4 main Service types available that can be provisioned. These are:
- Customer to CSP
- Customer to IX
- Customer ‘Data Centre Interconnect’ internal connection
- Customer ‘Data Centre Interconnect’ external connection, i.e. ‘Port to Community Port’
Provisioning a CSP Service
See the section on Port Analytics, under 'Ports' for further info.
Pick a section below to learn how to provision connections to the CSP's available via CloudLX:
Provision a Service to AWS
Provision a Service to Azure
Provision a Service to Google
Provisioning a Customer 'Data Centre Interconnect' Internal Service
This Service type creates a Layer 2 Service (EPL, supporting 802.1Q) between two Ports belonging to the same Customer. The main difference between provisioning a Service to a CSP and to another Port is the initial selection and how the Service is displayed on the screen.
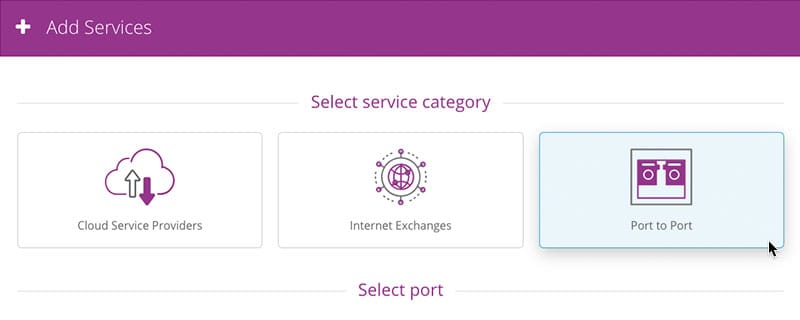
- Navigate to 'Services' and select 'Add Services'.
-
Select the ‘Data Centre Interconnect’ tile.
-
Select the Area, City, Datacentre, and the port that you want to connect from.
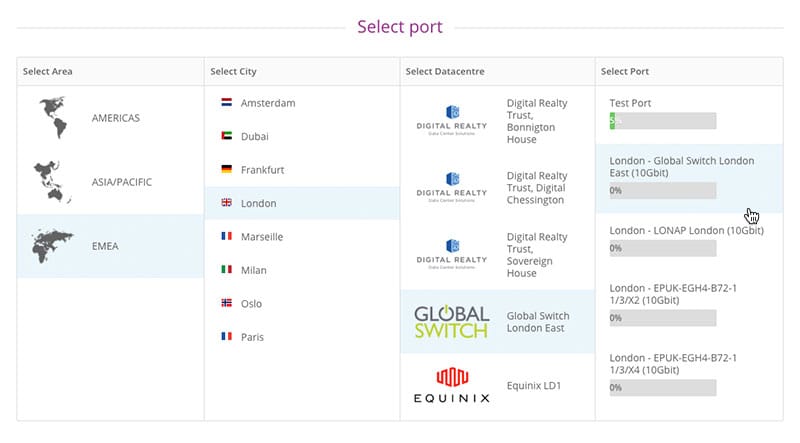
-
Select the Area, City, Datacentre, and the port that you want to connect to.
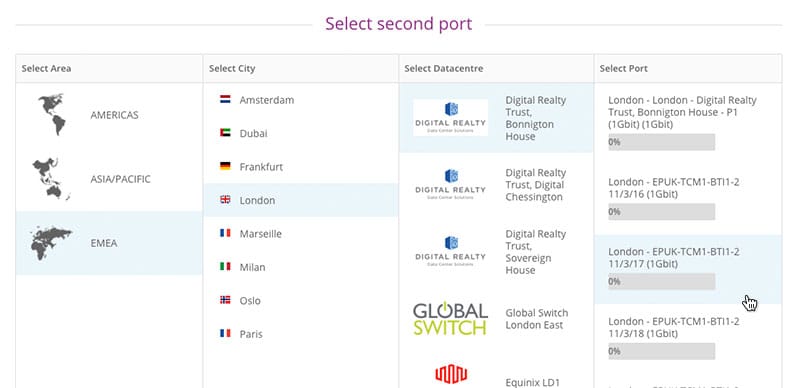
-
Select whether you'd like the service to be protected or not.
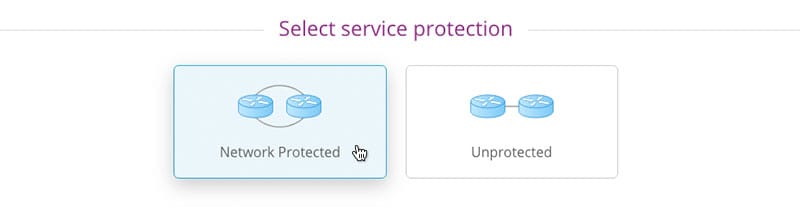 Please Note: Pricing may not always be available for both protected and unprotected services
 -
Use the 'Select speed' slider to pick the required speed of the service. You can either drag the handle or click on the labels to select the required value.
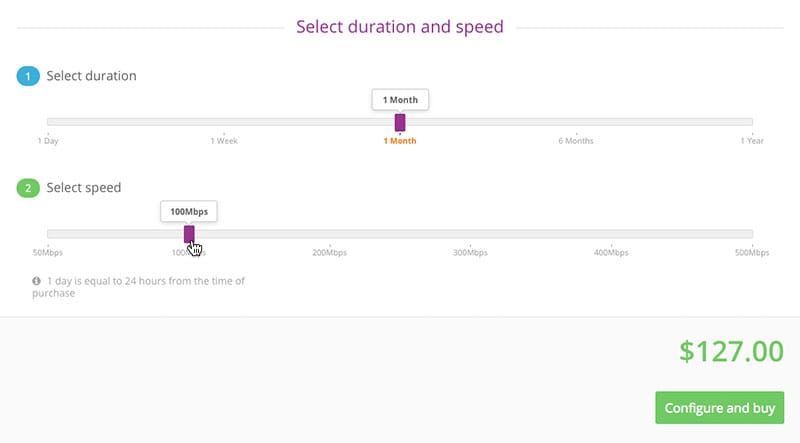
-
Click ‘Configure and buy’ to get the Service provisioning details window.
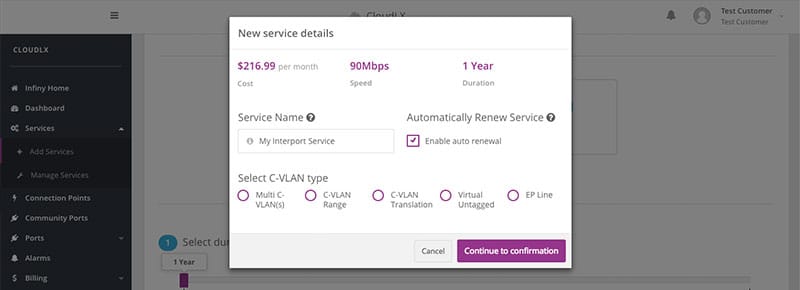 Fill in the following information:
Field Description Service Name This is the 'friendly' name of the Service, i.e. where it can be given a descriptive name, relating to a Customer’s context/use etc. C-VLAN Type This is the C-VLAN number (range: 2-4095) of the Service and must be unique on the Ports the service is being provisioned to. CloudLX will validate the Customer Port and the CSP Port for availability.
Multi C-VLAN(s) – This supports single or multiple C-VLAN numbers.
C-VLAN Range – This supports a range of C-VLANs between a min / max range.
C-VLAN Translation – This supports the ability to have a different C-VLAN number at one end of a service from the C-VLAN number at the other end.
Virtual Untagged – This supports a VLAN that is untagged sometimes referred to as the "Native VLAN". Any traffic that is sent from a host to a switch port that doesn't have a VLAN ID specified, will be assigned to the untagged VLAN. A port can only have one Untagged VLAN configured at a time.
EP Line - is implemented using a point-to-point EVC with no Service Multiplexing at each UNI (physical interface). An EPL is often used to provide point-to-point Transparent LAN Service (TLS), where the service frame's header and payload are identical at both the source and destination UNI.Enable Auto Renewal Leave this box ticked (default) for the Service to automatically re-new after the selected duration (term). If you want the Service to expire after the term, uncheck this box. Please Note: if left unticked, the Service will need to be created from new after expiration. -
Click the 'Continue to Confirmation' button and the Service confirmation window will then appear. Please Note: The currency displayed will vary depending on User account.
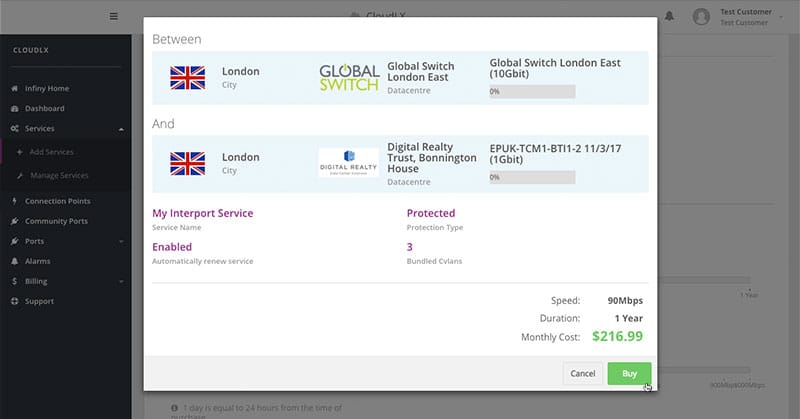
-
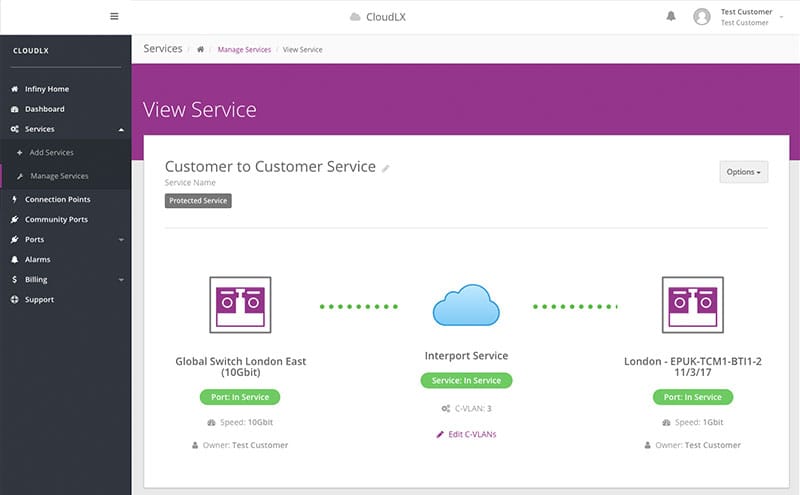
Click the 'Buy' button. This will provision the Layer 2 Service and direct you to the Service view.
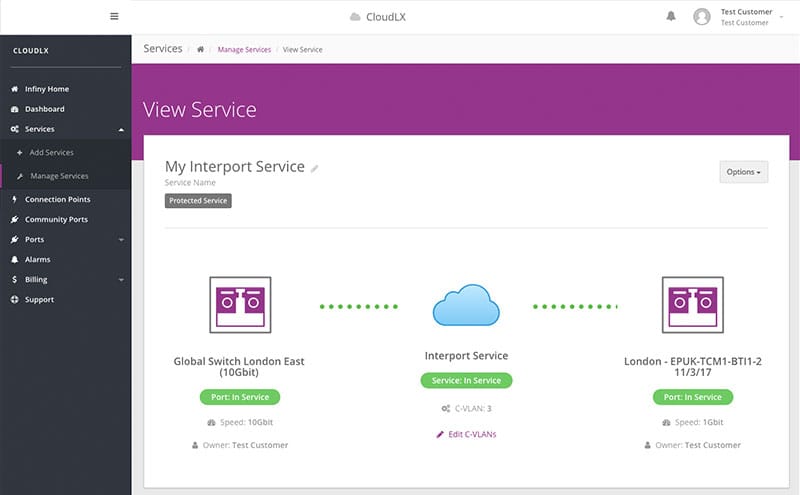
The overall Service status is displayed in the top right corner. In the main view, the Service status for each of the Ports is displayed along with the VLAN details and Speed of Service. The dotted line between the Ports reflect the current Service status:
- Green = The Service is 'In Service'
- Red = The Service is 'Down'
Provisioning a Customer to 3rd Party Customer Service (Community Port)
The ‘Customer to 3rd Party Customer’ Service (Community Port) is different from the other types of Service provisioning on CloudLX in that it requires authorization from both parties.
Pre-requisites for Customer Port to 3rd party Customer Port (Community Port):
- The Port has to be enabled for public access
There is a 2 step process to ordering a Service to a Port belonging to a different Customer:
- Create a P2P Service via CloudLX between one of your ports and a Community port made public by another customer
- The owner of the Community Port has to accept the newly requested Service if Enable Auto Provisioning is not enabled
Ordering a Customer to 3rd Party Customer Service (Community Port)
-
Navigate to the Community Ports page.
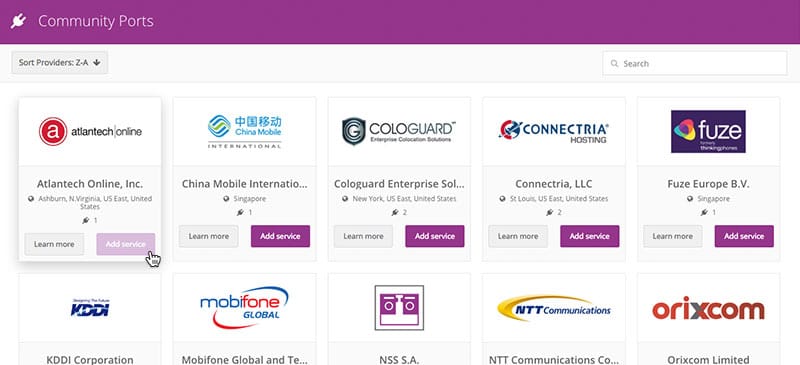
- Identify the partner that you want to connect to and click on the ‘Add service’ button.
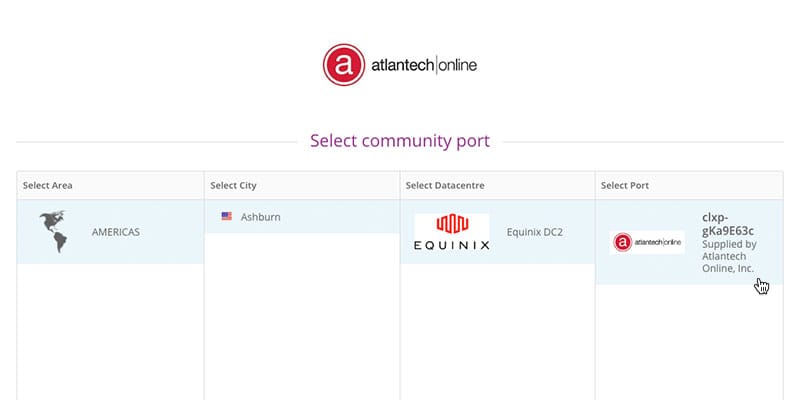
-
Select the Area, City, Datacentre and the Community Port that you want to connect to from the ‘Select community port’ section.
-
Scroll down the page and then select your own port from the ‘Select port’ section.
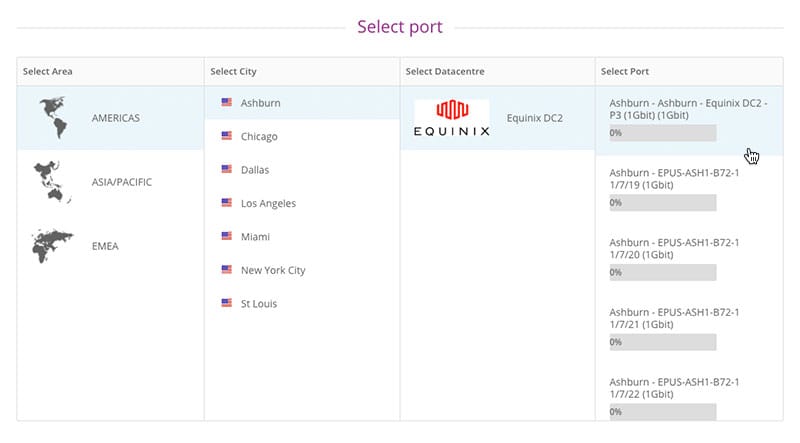
- Configure the service as a standard P2P service and complete the order.
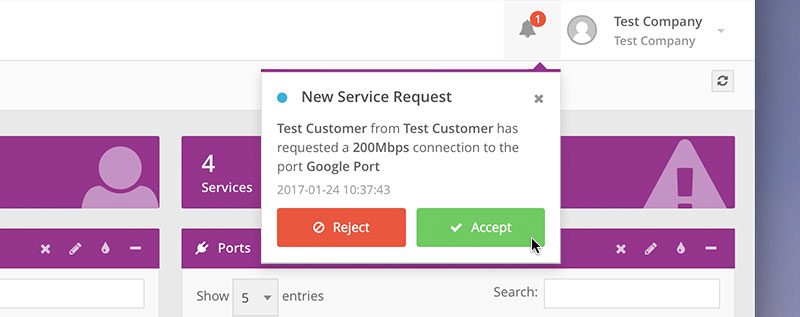
If the Auto Provisioning hasn’t been enabled, the request will now be sent to the required Customer who will receive a notification via email and also a notification within CloudLX. The notification icon on the required Customer’s portal login will have the request available for authorisation (as described below, under ‘Accepting a Service Request from Another Customer’).
The connection will be provisioned as soon as the request is accepted. There will also be an email notification along with the notification in the upper right hand corner of the portal screen.
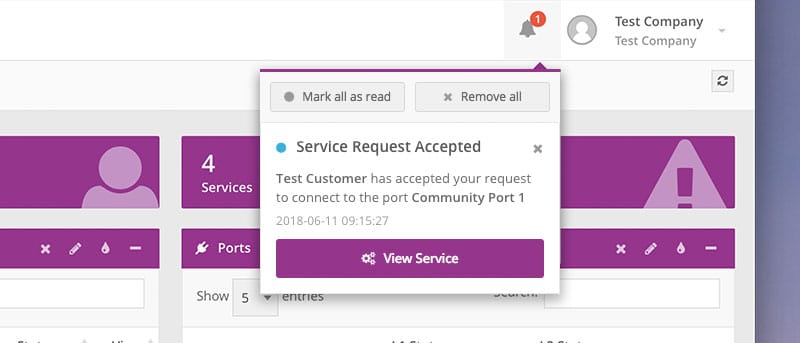
The Service can be viewed under ‘Manage Services’ or simply by clicking the 'View Service' button within the notification.
Accepting a Service Request from Another Customer
For security reasons a Service between two Customers can only be provisioned after both parties have agreed on the connection
Notifications about requests for 'Customer to Customer' Services will be received via email and then be visible in the notification window.
The alarm symbol indicates that a request/notification is pending. Click on the symbol.
Accept the request if the Service is as expected and specified. It is the requestor who will pay for the new Service.
Once the Service is accepted it will be provisioned instantly and be ready within 5 minutes.
The Service can then be viewed 'Manage Services’ along with all other provisioned Services:
The Service is 'In Service' when you see the green icon.

Service Analytics
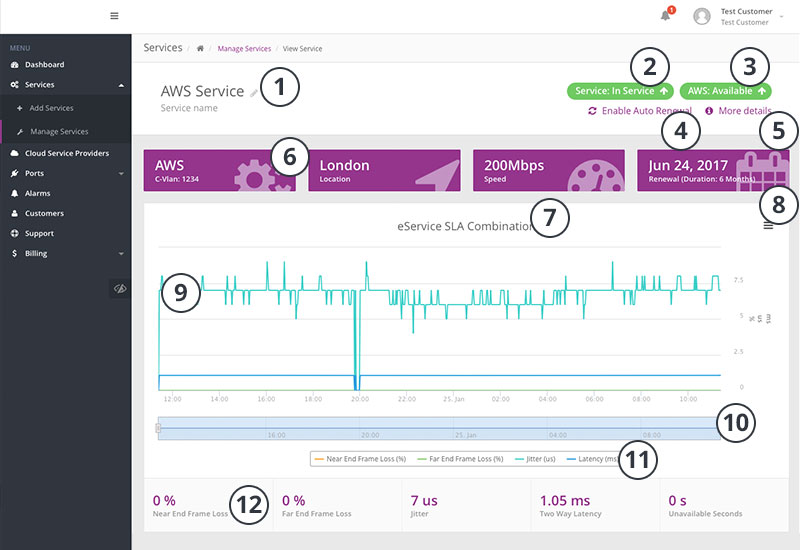
For each Service provisioned on CloudLX, the system generates an SLA Graph and a Bandwidth graph. Please Note: This is for ingress traffic only.
-
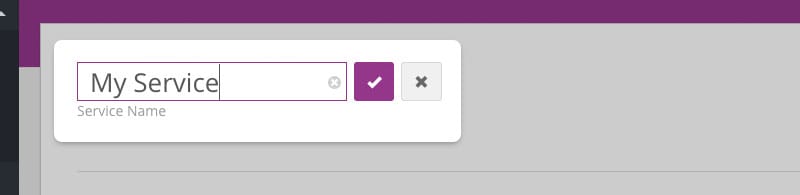
Service Name, which will be as defined when provisioning the Service. The Service name can be edited by clicking on it.
-
Service status, across the network. This badge indicates if the VLAN is established across the network:
Service Status Status Badge Service down, or in the process of being provisioned 
Service is up 
Service down, due to expiry 
Service status being (re)loaded 
-
Status of CSP Service (if applicable):
Service Status Status Badge CSP Service is being ordered 
CSP Service requires acknowledgement via CSP console 
CSP Service is established 
CSP Service removed (via CSP console) 
CSP Service status being loaded
-
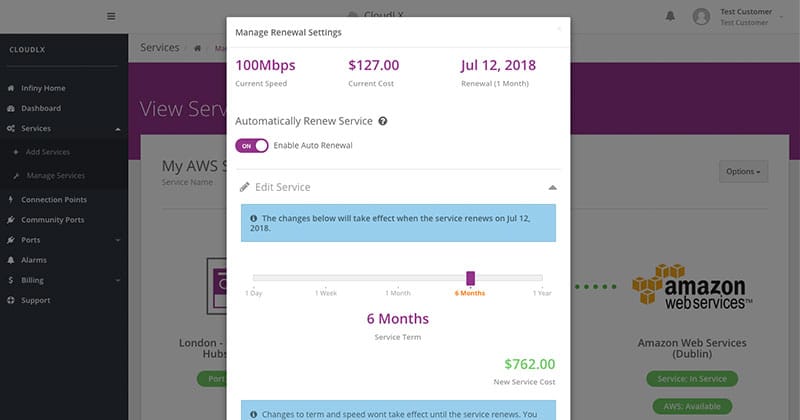
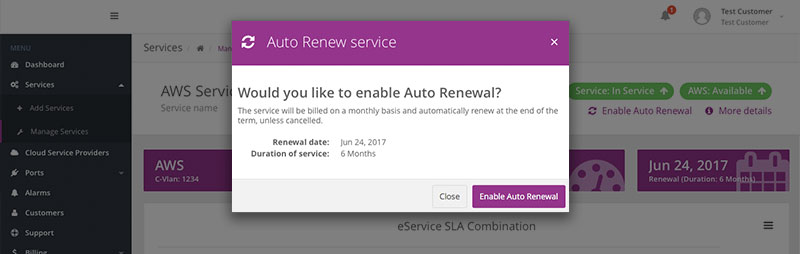
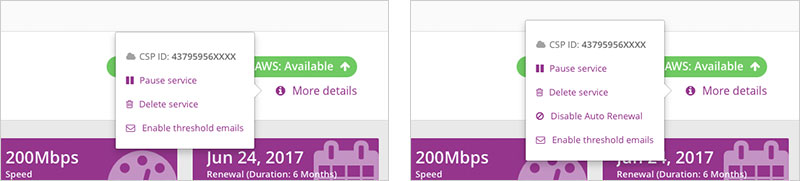
Enable Auto Renewal. This option is only visible if the Service is not set to auto-renew already. Disabling Auto Renewal is done via the 'More details' popover (see below).
-
More details. Displays a popover with the CSP ID to which the Service is provisioned:
-
Four tiles are visible under Services:
- CSP name and VLAN number
- Location
- Speed/CIR
- Expiry date and Duration (inc. if the Service is on auto-renewal)

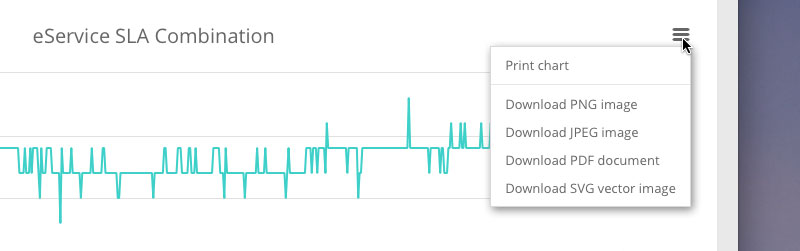
- Name of the graph.
-
Menu to save and print the graph for offline viewing.
-
Plot area, which can be zoomed and explored in greater detail, either by clicking and marking the desired area direct in the plot area, or, by adjusting the time line slider (see point 9).
The eService SLA graph shows 4 values on the graph:- Near End & Far End Frame Loss
- Jitter
- Latency
- Unavailable Seconds (UAS) (this is not displayed on graph)
UAS is a reflection of the unavailable seconds measured in the last 15 minutes.
The plot area (zoomed or not) will show the exact value for a given sample/point in time, when hovering the cursor over it.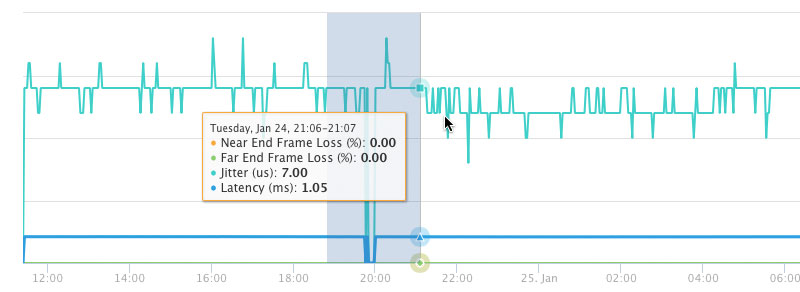
- Time line slider - this can be used for selecting and plotting a narrower time window. 'Grab' a handle and drag it to the desired position to zoom in.
-
Legend, and selector for which values to be plotted and included on the graph. Click on the description or colored line to enable or disable the relevant graph data.

- Values of the most recently reported values (to the graph).
- Dates to and from.
eService Bandwidth
The graph is located further down the page, under the eService SLA Graph and operates in the same way as described above.
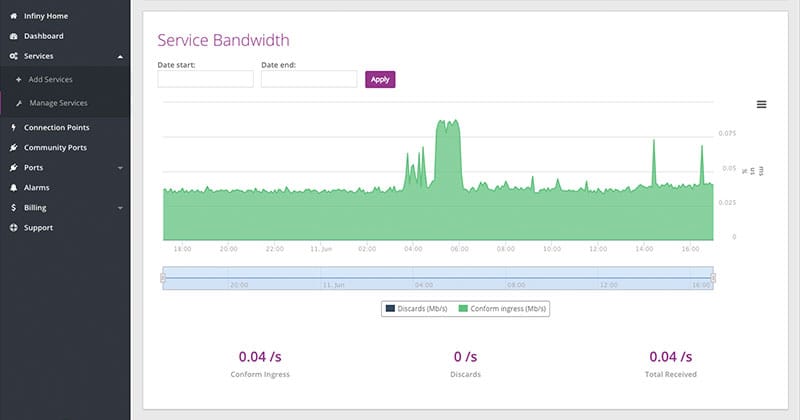
The ingress bandwidth profile displays two values on the graph:
- Conform Ingress
- Discards
Total received is displayed below the graph.
The CloudLX Services adhere to a strict CIR, and no bursting is allowed, traffic exceeding CIR is discarded at ingress and this is displayed as the black graphs stacked on top of the green conform graph.
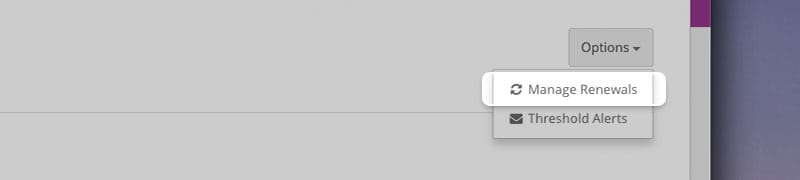
Managing the auto-renewal parameters for a CloudLX Service
For any of the active CSP and P2P services, the users can manage the auto-renewal parameters (the service term and sometimes the service speed too) for that service before the services expire by navigating the Manager Services page, selecting the service, and then the “Manage Renewals” option from the Options drop down box.